Showing posts with label freezer cooking. Show all posts

Monday, February 3, 2014

Easy Breakfast Egg Cups

The husband and I are embarking on a new eating plan this week! We are still going to be gluten free but are taking the extra step and cutting out simple and complex carbs and sticking to a high protein / low sugar plan. I have about 10 pounds of baby weight that I want to kick and the husband just wants to get back in a good workout/ healthy eating routine.

So, in order to streamline my cooking efforts a bit I decided to try making a high protein breakfast for the hubs to eat every morning, but didn't require me to wake up with him each morning to cook it. I mean I love him and all, but his 6 a.m. alarm comes way too soon for this tired mama who has usually been up 2-3 times with the 6 month growth spurting offspring. (seriously...give me ALL the coffee today).

The result of my desire to feed the husband well but still get another hour of shut eye resulted in these little babies. They are delicious, quick and can be kept in the freezer during the week. The husband just pops them in the microwave for a couple minutes and voila...homemade gourmet breakfast! Ok...maybe not gourmet...but better than cereal or pop-tarts. Here's the handy dandy recipe!


Breakfast Egg Cups

What you need (makes 14)

- 12 large eggs
- 1 Cup milk
- 6 strips bacon, cooked and chopped
- 1/4 C diced red pepper
- 1/4 C diced onion
- 1 C shredded cheddar cheese
- 1/2 tsp salt
- 1/4 tsp pepper


Directions

- Preheat oven to 350 degrees and grease a 12 cup muffin tin. This recipe makes 14 "muffins" because I wanted them to last a whole week so you'll have a little extra after the first batch. If you only want to make 12 just reduce the eggs to 10 and 3/4 C of milk.

This is my new best friend. I love it!

- Beat the eggs slightly and add the milk. Continue beating until smooth and slightly frothy


- Add in the bacon, peppers and onion


- Add in 1 cup of shredded cheese and the salt and pepper


- Evenly distribute the egg mixture into the muffin cups


- If you're feeling fancy, top with a little dried parsley flakes.

- Bake at 350 for about 15-20 minutes, until the eggs have set and are puffed up


- Run a knife around the edges to release and invert them onto a cooling rack (this will prevent them from collapsing too much)


- I wrap 2 "muffins" in a piece of foil and place them in a freezer bag. The husband eats 2 every morning which is equivalent to 2 eggs and along with the bacon in there it's a pretty filling and hearty breakfast.

- You can easily add whatever combination of vegetables and cheese/spices you like. Ham, broccoli, asparagus, spinach, parmesan, feta - hard to mess these up!

Thursday, April 4, 2013

Easy Lemon Chicken Cordon Bleu

Even though the husband and I try not to eat meat super often (usually only once or twice a week) we both REALLY love chicken. My husband will usually pick a steak over a chicken dish if we go out but since beef is expensive and a little more challenging for me to cook well, we do a lot of chicken at home. This is a recipe that I have made a lot and it is delicious! It isn't the traditional chicken cordon bleu (usually coated in breadcrumbs and accompanied with a mustard sauce) but we both love it, especially the husband who hates anything with mustard in it.

Unfortunately since we found out about our little guy on the way, I haven't been able to cook (or even look at) raw chicken. I wasn't even able to eat it without gagging a little until a month ago. I can eat it fine now if I don't have to prepare it, but if it's raw forget about it. Thus, there aren't any step by step pictures to go along with this recipe because I didn't actually make it recently. But...I HAVE made it in the past and it's quick and easy enough for a weeknight meal but also turns out well as a freezer meal. I hope you guys enjoy it and I can't wait to make it again after our little dude is born!


What you need (original recipe from canyoustayfordinner.com)

- Chicken Breasts (1 for each person), butterflied
- Thinly sliced ham (1 for each person)
- Provolone cheese (1 for each person)
- 1 lemon, sliced thin
- Coconut oil (or olive if you prefer)
- Seasoned salt and pepper
- Dried parsley


Directions

- Preheat oven to 400 degrees

- Line a baking sheet with parchment paper and set aside

- Butterfly each chicken breast to look like this

(picture from canyoustayfordinner.com)

- Season the inside of each butterflied breast with salt and pepper

- Place a piece of ham and a piece of cheese on on half of the butterflied breast. You may need to tear the ham and cheese a little so it doesn't extend over the edges of the chicken

- Fold the other half over and secure with a toothpick

- Brush the top of the breast with oil and generously season with salt, pepper and a little dried parsley

- Put a lemon slice on top of the chicken bundle

- Repeat until all the chicken breasts are filled and seasoned

- Bake for 20 minutes and serve!

(picture from canyoustayfordinner.com)

Tuesday, March 19, 2013

Freezer Cooking Day Part 2

Welcome to Freezer Cooking Day 2! As I mentioned in the previous post, I really enjoyed splitting up the cooking over 2 days. It helped me not feel rushed or stressed out and I knew what my stopping points were for each day. You don't have to do it this way by any means, it's just what helped me the most this time around.

Since I had the most time on Saturday, I decided to use Sunday as the "no cook" recipe day. We went to church, I came home and took a nap, made these recipes, and STILL had time that night to relax and hang out with my husband. Here's a list of the recipes (with links) that I made on day 2:

- Oven Baked Chicken Fajitas (Follow freezer directions in post)
- Crockpot Italian Chicken (Follow freezer directions in post)
- Honey Garlic Chicken (I made this twice because its so easy and a favorite!)
- Cinnamon Rolls (I made 2 batches. Follow freezer directions in post)


Here was my game plan:

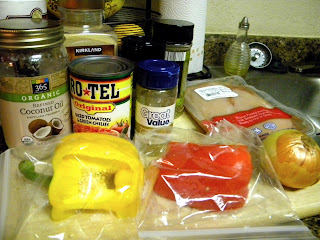
Step 1: Assemble and prepare all ingredients for Fajitas and place in gallon freezer bag.


Step 2: Place ingredients for Italian Chicken in gallon freezer bag

A 3 ingredient meal! Love it!

Step 3: Assemble and prepare ingredients for Honey Garlic Chicken and place in gallon freezer bags

I made this recipe twice because we love it so much!

Step 5: Clean counters and prepare cinnamon rolls. This was the longest recipe because it required some mixing. But the others were literally 10 minutes at the MOST to prepare.


Step 6: Clean up and RELAX! All done!


This gave us about 17 meals (including lunch leftovers for myself and Jon) plus the granola to snack on and cinnamon rolls for 2 mornings. I'd say it was definitely worth all the hard work! I mapped out when to serve each meal but obviously things change and happen (like um...finding out you're pregnant!) and meal plans get thwarted. All that to say I will definitely be doing this again before the baby comes so that we have have meals ready to go! 

I hope this inspires you all to take some time (even if it's just a few hours) and get some meals prepared! I promise it will be worth it!

Thursday, March 14, 2013

Freezer Cooking Day 1

Have ya'll heard of freezer cooking? I'm sure you have and many of you have probably done it before. I myself have done a few freezer cooking days and have always benefited from the results! I decided to do one a few months ago just as a way to make it easier to decide what to make for dinner and also to help with my work schedule. It's really nice having something ready to go when I get home! I decided I would document the day with what recipes I decided to make and how I accomplished making them all. I hope it helps inspire you if you've thought about doing a freezer day before, or at least gives you some new recipes to try!


In order to keep myself from going insane, I prepared all of these meals over 2 days (Saturday and Sunday). On Saturday I did meals that required cooking (stovetop or oven) and then on Sunday I did the meals that didn't require any cooking. I really like splitting it up this way and I was able to make a TON of food and still keep my sanity. I am in no way an expert at doing this, but this is what worked for me! So here is what my Saturday cooking day looked like!

Here's a full list of everything I made (links to recipe by clicking on the title)
- Tortilla Soup (I left out the chicken to make it vegetarian and split into 2 meals)
- Bean and Rice Enchiladas (I made 2 batches, one regular and one with chicken added)
- Twice Baked Potatoes (I left out the green onions and made a total of 16 potato halves)
- Macaroni & Cheese (I made 2 batches. Prepare as directed until baking time. Then wrap and freeze.)
- Chicken Chili (Cook as directed minus spinach, then store in freezer bags)
- Granola (3 batches, store in airtight containers)

Here's how I mapped out my game plan:

Step 1: Drink coffee before starting. If you don't like coffee drink something with caffeine. It's going to be a loooong day!


Step 2: Since I used Saturday as my day to prepare anything that required the stove or oven, I started with the things that would take the longest. The most involved recipes are the tortilla soup, enchiladas, and the twice baked potatoes. 

I threw the potatoes in the oven first, since they had to bake for 1 hr

I started cooking my rice for the enchiladas
And lastly I got my tortilla soup going on the stove


 By the time my soup was finished, the potatoes were done and the rice had cooked and cooled. I bagged up the soup into freezer bags (split into 2, quart sized bags) and into the freezer and cut my potatoes in half to cool off a bit.

Step 3: I started boiling the water for my macaroni noodles, threw 2 chicken breasts in the oven (for enchiladas and chicken chili) and made the filling for the enchiladas.

Macaroni noodles

Chicken baking for enchiladas and chili

Enchilada filling


Step 4: I finished the macaroni and cheese, and placed it into foil pans and into the freezer. I put my hubby to work wrapping the first batch of (meatless) enchiladas and I started getting my ingredients together for the chicken chili.

2 pans of Mac and Cheese ready for the freezer!

The hubby helping me out!

Chopping away for the chicken chili


Step 5: Remove chicken from oven and shred. Add 1 chicken breast to the enchilada filling and set the other aside for the chicken chili. Start the chicken chili, husband finishes wrapping the 2nd batch of enchiladas and while the chicken chili simmers, make granola.

Chicken Chili simmering on the stove

Making 3 batches of yummy granola!

Step 6: While granola is baking, finish the chicken chili and divide into freezer bags (I split it into 2, quart sized bags like the tortilla soup). Start washing those dishes!!

Step 7: When all three batches of granola are finished, have the husband finish the dishes and clean-up and put your feet up and REST! More to do tomorrow!