Showing posts with label dessert. Show all posts

Thursday, July 25, 2013

Peach & Nectarine Cobbler

What do you do when you are 39 weeks pregnant in the dead heat of summer and your doctor lovingly tells you there's nothing you can do to encourage your unborn child to make his appearance?

Drown your frustration and grumpiness in brown sugar coated peaches and nectarines. With vanilla ice cream on top. That's very important.

Since I'm at the end of this pregnancy and all I can really think about is getting this child out of me, I'm trying to distract myself with different activities each day. I've never attempted a gluten free fruit cobbler before and since I had a bowl full of organic peaches and nectarines I figured it was a good activity for this pregnant lady to try out. Plus, I got to pig out on the results afterwards. Score!

This turned out wonderfully! The husband and I each had a bowl before dinner and I had another for breakfast the next day. I'm sure you could easily substitute other fruits depending on what is in season.

What you need (forgot to take a picture - sorry!)

Filling:
- 4 C sliced peaches/nectarines (I had both so I used both)
- 1/2 C cold water
- 1/3 C unpacked light brown sugar
- 1 T cornstarch
- 1 T unsalted butter

Topping:
- 1 C all-purpose GF flour (I used my usual blend found here)
- 1/2 C sugar
- 1 1/2 tsp baking powder
- 1/2 C milk (I used almond)
- 4 T (1/2 stick) softened butter
- Cinnamon & Sugar for garnishing


Directions

- Preheat oven to 350 degrees

- In a small bowl, combine the flour, sugar and baking powder.


- Add the milk and butter and beat with a mixer until smooth


- Over medium heat in a large saucepan, combine the filling ingredients and cook until bubbly (5-10 minutes)

This will smell AMAZING!

- When the filling is bubbling, pour into an ungreased 13 x 9 inch baking dish

- Spoon the topping over the filling. This didn't work out too well for me so I ended up kinda swirling it in and it came out just fine.

- Sprinkle a bit of cinnamon and sugar on top if desired

- Bake for 35-40 minutes, until the top is golden brown


- Serve warm with vanilla ice cream (or whipped cream would be good too!)

Mmmm so good!

Enjoy! I'm gonna go try and have a baby now!

Wednesday, November 14, 2012

Pumpkin Bread

I love pumpkin bread. To me there is nothing that says "here comes fall" like a nice warm piece of pumpkin bread and a cup of hot tea on a chilly day. This was the perfect fix for a whopper of a pumpkin craving I had the other day. The best part about this recipe (other than the fact that it tastes uh-mazing) is that it makes 3 loaves at once. Perfect for gifts or to freeze for later! I personally plan on making this again ASAP. The husband after saying "This is GLUTEN FREE??" described it as "A cool autumn day in my belly." He's so silly...but seriously it is. The original recipe called for oil but I substituted unsweetened applesauce and it worked awesome! Can't wait for you to try it!

What you need (for 3, 8 x 4 inch loaves)

- 2 1/2 C white rice flour
- 1/2 C cornstarch
- 5 tsp pumpkin pie spice
- 2 tsp baking soda
- 1 1/2 tsp salt
- 1 tsp xanthan gum
- 4 eggs
- 1 C applesauce
- 1/2 C orange juice (no pulp)
- 3 C granulated sugar
- 1 Can pumkin puree (not pie filling!)


Directions

- Preheat the oven to 350 degrees and spray your loaf pans. Set aside

- Combine all the ingredients up through the xanthan gum in a stand mixer (I've been borrowing my mom's for a few weeks now...sorry mom I'll bring it back one day I promise!)


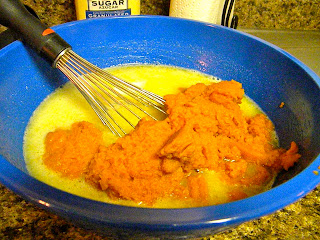
- In a separate mixing bowl, combine the eggs, applesauce and orange juice. Add in the sugar and canned pumpkin and whisk together well


- Add the wet ingredients to the dry and whisk together until smooth. You may need to scrape down the sides a couple of times.


- Separate the batter into the 3 loaf pans evenly.


- Bake for 1 hour or until a toothpick comes out clean


- Serve warm! I had 2 pieces the day I made these. The first one I had plain and it was great. The second piece I added cream cheese and a cup of tea. Add in the rainy drizzle outside and it was a perfect afternoon treat! YUM!


- Such a delicious fall treat! Next time I'll add some pumpkin seeds on top of the batter before baking!

I have some exciting posts coming up in the next few weeks. A freezer cooking day, gluten free cinnamon rolls and the VanLue family Thanksgiving just to name a few! Keep checking back!

Thursday, July 19, 2012

Chewy Chocolate Chip Cookies


You all know that I'm not a huge baker. I used to LOVE to bake but became a bit fearful of it once I had to cut out all gluten. I'm slowly getting more comfortable with mixing flours and substituting things. The other day it was raining and lovely and I desperately wanted to smell chocolate chip cookies baking. So I set out to make these little babies and I was not disappointed! These are really delicious. Great texture and taste and even gluten lovers said they were good (which is the best compliment ever!) I hope you enjoy them as much as I did!

What you need (original recipe from Land O Lakes.com)
- 2 1/4 C all purpose flour blend (my recipe is below)
- 1 tsp baking powder
- 1 tsp baking soda
- 1/2 tsp salt
- 1/4 tsp xanthan gum
- 3/4 C packed brown sugar
- 1/2 C white sugar
- 3/4 C butter, softened
- 2 eggs
- 2 tsp vanilla
- 1 package semi-sweet chocolate chips


Flour Blend


- 2 C white rice flour
- 2/3 C potato starch (make sure it's not potato flour...not the same thing!)
- 1/3 C tapioca flour
- 1 tsp xanthan gum

Combine all ingredients and store in an airtight container.


Directions


- Mix together the flour, baking powder, baking soda, salt and xanthan gum in a medium bowl and set aside for later


- In a large bowl, beat the brown sugar, white sugar and butter together until fluffy


Add the eggs one at a time, beating well after each one


- Add the vanilla and beat well, scraping the bowl as needed


- Add in the flour mixture in stages, beating well after each addition


- Add in the chocolate chips and stir gently to combine


- Use a tablespoon to drop the dough onto a greased cookie sheet


- Bake for 9 minutes or until golden brown (DO NOT OVERBAKE!)

- Let cool slightly (if you can be patient that long) and enjoy!! These were the perfect companions to my rainy afternoon and it makes about 3 dozen so you have plenty to share! Happy baking!


Thursday, June 7, 2012

Blueberry Boy Bait

This recipe is one of the husband's favorites. I made it for him early on in our courtship and he always enjoys when I make it for him. My mom made this for my dad when they were dating, and it apparently hooked my dad also...hence the name "boy bait". A few weeks ago we went blueberry picking and came home with seven...yes seven...gallons of blueberries between my mom and I so in an effort to use them up I figured I would try a gluten free version of this infamous dessert. It came out wonderfully well and the husband was impressed...and frankly so was I! I'm glad to have a version of this that I can eat and the husband can enjoy. It is NOT, I repeat NOT a healthy recipe but it is amazingly tasty and let's face it, not all things can be healthy!

What you need
- 2 C GF all purpose flour blend (I used the blend from the gluten free bible cookbook)
- 2 C sugar
- 2 tsp baking powder
- 1 tsp salt
- 2/3 C butter, softened
- 1 C buttermilk (you could sub any kind of milk but I think the buttermilk is best)
- 2 eggs
- 1 tsp vanilla
- 2 C frozen blueberries
- Cinnamon and sugar for topping


Directions


- In a large bowl combine the first 5 ingredients and mix well


- Add the eggs, beating well after each one


- And gradually add the milk and the vanilla


- Beat batter until smooth and pour into a greased 9 x 13 pan

- Place the blueberries on top


- In a small bowl, mix 1/4 C sugar and 1 tsp cinnamon together. With a spoon, sprinkle the cinnamon sugar over the top of the blueberries


- Bake at 375 for 30 minutes or until golden brown on top

- I didn't get a picture of the finished pan because we were SO excited to try it. I did manage to get a picture of a few crumbs though!


- I am so excited that this turned out so well. It tastes SO much like the original! It's technically a dessert, but if you want to have a piece for breakfast I won't tell. Give it a try and let me know what you think!

Thursday, April 12, 2012

Honey Bun Cake

Hey everyone!
I have a great recipe from Easter to share with you today! My cousin sent this to me and I needed something fast and easy for an Easter dessert so I decided to try it. It was a huge hit! I forgot to take pictures when I made it (sorry!) but it is SO easy that you won't need the step by step shots. Here's what you need!

What you need
- 1 box gluten free yellow cake mix (I used Betty Crocker)
- 1 C sour cream (you could use low fat if you want but I used regular)
- 1/4 package vanilla instant pudding mix
- 1/2 C oil (I used coconut, just make sure it stays melted!)
- 3 eggs
- 2 T milk (I used almond)
- 1 T vanilla extract
- 1/4 C honey
- 1/3 C packed light brown sugar
- 1 tsp ground cinnamon

Directions
- Preheat oven to 350 degrees
- In a large bowl combine the cake mix, sour cream, pudding, oil, eggs, milk and vanilla.
- Beat with a mixer on medium-low speed until combined
- Pour batter into a greased 13x9 cake pan
- Drizzle on the honey (Tip - if you lightly spray the measuring cup you're using for the honey before you measure it, the honey will slide right out!)
- Sprinkle on the brown sugar and cinnamon
- With a knife, gently swirl the batter to that the topping marbles throughout the batter
- Bake for 35 minutes
- Let cool, cut into squares and serve! It was really delicious! This would be really good for a brunch as well. Tasted like a cinnamon coffee cake!

Here's what the finished product should look like!


Thursday, February 23, 2012

Something Sweet

Hey everyone!
Sorry I haven't been posting very often lately. I'm hoping to get in the habit of posting more often. I have a really great recipe for you guys to try today (or tomorrow, or the next day...but today would be best because it is SO yummy.) I made these cookies for a bridal shower recently and they got high praise...even from gluten lovers! And more importantly, my hubby liked them as well...so this recipe went straight to the "must make again" pile. Hope you enjoy them!

Flourless Peanut Butter Chocolate Chip Cookies (adapted from Martha Stewart)


What you need
(makes approx. 36 cookies)
 - 2 C creamy peanut butter
 - 3/4 C white sugar
 - 1/2 C agave nectar
 - 1 tsp baking power
 - 1/2 tsp salt
 - 2 eggs, lightly beaten
 - 3/4 C milk chocolate chips
 - 3/4 C butterscotch chips
 - 1 C roasted, lightly salted peanuts

(Note: If you don't have agave nectar just increase the white sugar to 1 1/2 C. You can also use only chocolate chips, I just didn't have enough so I added the butterscotch)

Directions 
 - Preheat oven to 350.
- In a large bowl, combine peanut butter, sugar, agave nectar, baking powder, salt and eggs. Stir until smooth.
 - Add in your baking chips and peanuts. Fold in until combined.
 - Scoop out dough using a Tablespoon and roll into balls.

- Place on cookie sheet 2 inches apart.


- Bake for 10 minutes or until lightly brown on top.


 - Enjoy!
These really are delicious and SO easy. I was very impressed with how well they hold up especially with the absence of any kind of flour. As I mentioned before, you could easily leave out the agave nectar and butterscotch chips if you don't have it or don't prefer it. I like using agave nectar when I can because it absorbs in your body more slowly than regular sugar and therefore prevents the blood sugar peaks and drops. You can't omit the white sugar completely in this recipe though because the dough will be too runny (I learned that the hard way!)

I hope you enjoy these! Bonus: These will make your house smell like a Reese's Peanut Butter Cup...mmmmm!!!

Have a great weekend! Look for my granola recipe on Tuesday!